03. AlmaLinux installation
How to download?

Based on the source code of Red Hat Enterprise Linux (RHEL), a fully compatible and free distribution called Alma Linux is created. This is what we will use to prepare for Red Hat certification.


AlmaLinux can be downloaded from the website almalinux.org either through the direct link or using a torrent. This entire course was made using the CentOS Linux distribution, which was also a copy of RHEL. However, CentOS support has recently been discontinued, and for the relevance of the course, I have chosen AlmaLinux. It can be said that the only differences are the name, logo, and website, so there is no point in completely redoing the entire course. Just keep in mind that when I say CentOS, it means Alma for you.

We can download the DVD image of about 9 gigabytes, which contains all the necessary software for installation, or the minimal image of about 700 megabytes, which will download the required components from the internet during the installation. Since I will be installing the system multiple times with a graphical interface, without a graphical interface, etc., I will download the 9 GB DVD image.
Preparing VirtualBox


After everything is downloaded, launch VirtualBox and create a new virtual machine. If you specify “Cen” in the name, the program will automatically suggest the operating system type (Linux) and version (Red Hat (64 bit)). Then specify the amount of RAM for the virtual machine. The minimum value is 2 gigabytes, but you can get by with even smaller parameters for systems without a graphical interface.

Next, select “Create a virtual hard disk” since we need it for the operating system, and we don’t have a ready-made disk. Then, choose the type of disk, depending on whether we need to transfer this virtual disk to other platforms or not. Since we don’t plan to do that, select VDI, which is the native format for VirtualBox. After that, choose how the virtual disk will occupy space on our real disk. There are two options - either we give the virtual machine a disk with a certain virtual size, the real size of which will change depending on the actually used space, or we immediately allocate space for the virtual disk, after which this space will become unavailable for the host, regardless of whether there is data in it or not. There is a slight difference in performance in favor of a fixed size, but the dynamic method leaves more space on the computer. Such approaches to space allocation are often referred to as thin and thick provisioning, respectively. Then choose where the virtual disk will be stored and its size. The size depends on the number of installed programs and stored files. For a minimal installation, it is advisable to allocate at least 8 gigabytes, and in our case, I will specify 20 gigabytes, which should be sufficient with a margin.

After clicking Create, right-click on the newly created virtual machine and go to Settings.

In the General tab - Advanced - Shared Clipboard, set the value to Bidirectional, which allows copying text between the host and the virtual machine, creating a shared clipboard.

In the Display tab - Screen - Video Memory, increase the value to 64 MB or higher, as with low values, the graphical interface of the virtual machine may become sluggish.

In the Network tab - Adapter 1, change Attached to: NAT to Bridged Adapter and select the network adapter that the network on our computer is connected to. This allows the virtual machine to be on the same network as the host.

After that, click OK and then Start to launch the virtual machine.

VirtualBox will prompt you to specify the installation media from which the operating system will be installed. In the new window, click on Add and then select the Centos ISO file that you downloaded. Afterward, select this image and click Choose.
AlmaLinux installation

In the new window, the “Test this media” option will be pre-selected by default. This option will start checking the installer for integrity, which takes some time. Instead, choose the option “Install CentOS Linux 8” (by pressing the up arrow) and press Enter. The graphical installer will then load, and you can interact with it using the mouse.

If you try to click on the screen, VirtualBox will notify you that the virtual machine will capture your mouse, and you won’t be able to use it on the host. This is not a problem, as you can release the mouse by pressing the right Ctrl key whenever you need it. So, press Capture.

When it comes to choosing the installer or operating system language, I recommend using English (US). It’s crucial to know IT terminology in English, and it will also help you avoid further misunderstandings. Now, let’s go through the settings.


In the Keyboard menu, add the desired layout and choose the hotkeys for switching between layouts.


In the Network & Host Name menu, enable the network adapter to establish a network connection, and specify a name for the computer.


In the Time & Date tab, make sure that Network Time is enabled and set the correct time zone.

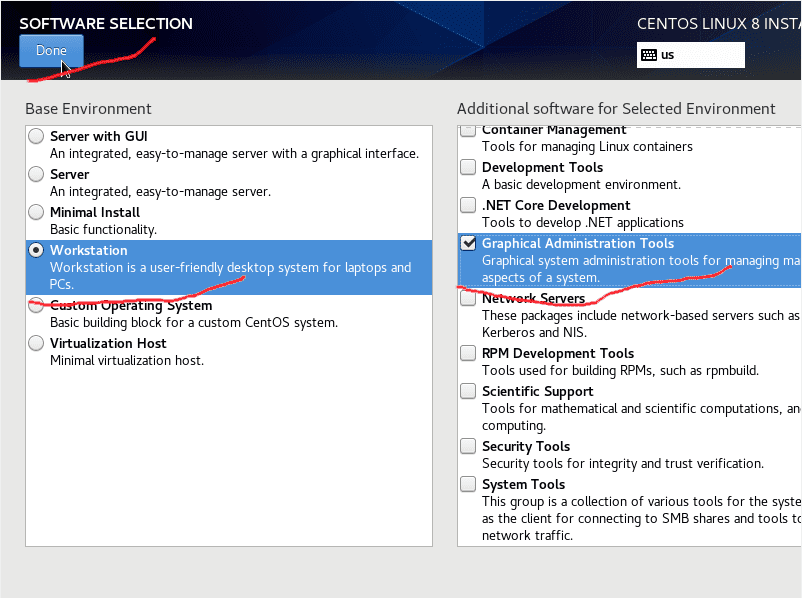
In the Software Selection tab, choose “Workstation” and select the checkboxes for the packages you want to install.


Go to the Installation Destination tab and simply click Done. The installer will automatically partition the disk. I won’t cover disk partitioning at this moment since it requires understanding of several topics that we haven’t covered yet.

Click Begin Installation.
While the installation is in progress, we need to set the root password and create a user.

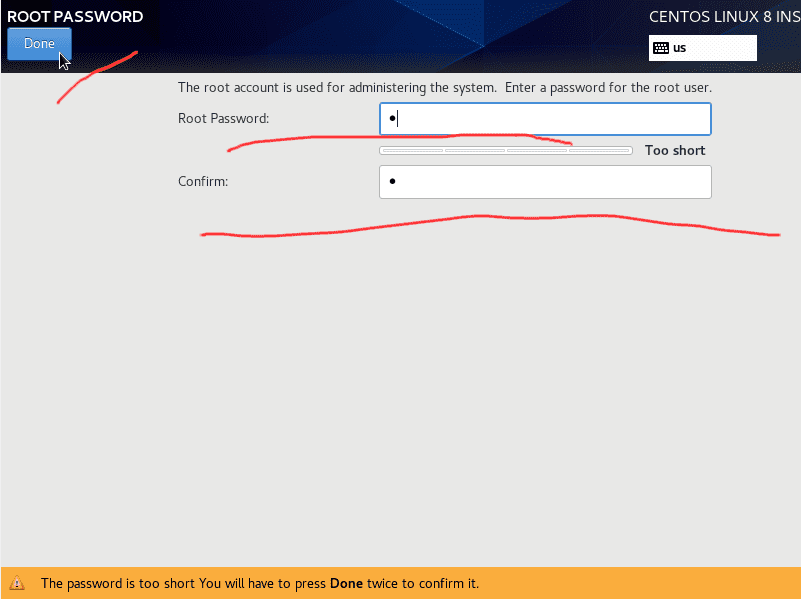
The root user has all administrative privileges on the system and can perform almost any action on the operating system.


Next, create a user and check the “Make this user administrator” option. Even though we have the root user with full system privileges, it’s safer to use a user with administrative rights.

Then, wait for the system installation to complete.


After the installation, unmount the ISO image and reboot the virtual machine (Devices – Optical Drive – uncheck the installation image, then Machine – Reset to reboot).


Upon startup, accept the license agreement.


Then, log in as the user “user.” The Gnome desktop environment will ask us for a few settings and show a window with its features. I recommend exploring them.
Guest Additions Installation


Next, we should install updates. To do this, click Activities – Terminal, and in the terminal, enter the command (sudo dnf update -y), then the terminal will ask for the user’s password. The entered password will not be displayed, so just type it and press Enter. This command will update our system.
sudo dnf update -y

Sometimes, if there are network failures, the command may give an error, so it’s worth reading the last lines. If you see an error or something similar, try running the previous command again. If you see “Complete,” everything is fine.

After the update, we need to install a few programs (sudo dnf install kernel-devel kernel-headers elfutils-libelf-devel gcc make perl -y). This is necessary for the installation of guest additions - drivers and utilities required by the virtual operating system to work with the hypervisor. Without them, the virtual machine will still work, but some functions will not work properly - screen resolution won’t be detected, shared clipboard won’t be available, etc. On advanced hypervisors, such additions can even show detailed information about the virtual machine on the host and allow for some level of control over it.
sudo dnf install kernel-devel kernel-headers elfutils-libelf-devel gcc make perl -y


After the previous command is successfully executed, restart the virtual machine, then log in again with our user.


Next, in the VirtualBox window, go to the Devices menu and choose “Insert Guest Additions CD Image,” which will download the necessary disk image.


After that, the disk will be connected to the virtual machine, and we can click “Run” to install the guest additions.

When the new terminal displays the message “Press Return to close this window,” we need to restart the computer again. This time, the operating system will correctly detect the screen size and adjust to the VirtualBox window size.

Snapshots
I advise you to explore the settings and programs to familiarize yourself better with the graphical interface. And to avoid having to reinstall the system if you accidentally break something, let’s take a snapshot. This feature of the hypervisor allows you to save the current state of the virtual machine, which allows you to roll back to this state later if needed.


To do this, click on the icon next to the virtual machine (Tools), choose Snapshots, click on Take, and specify a name and description for the snapshot.

You can have multiple snapshots to roll back to different states. To revert to a specific snapshot, turn off the virtual machine, select the snapshot, and click on Restore.